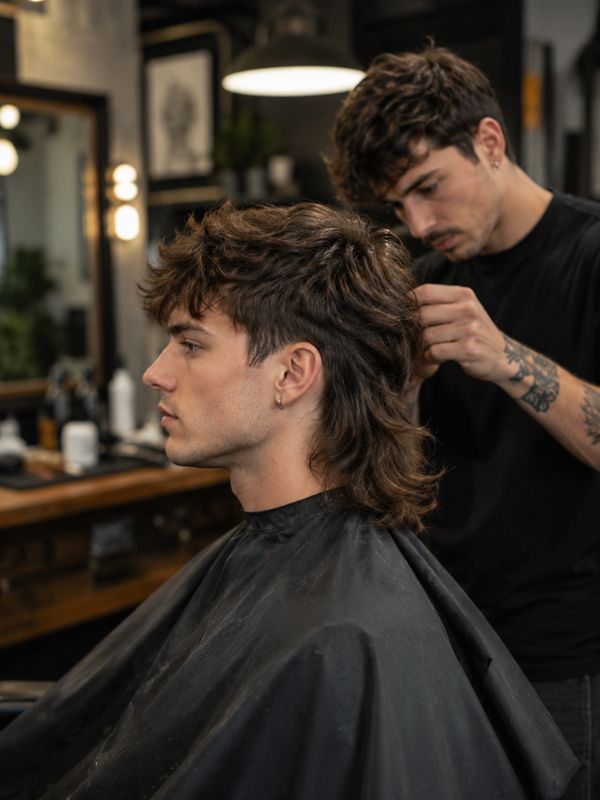
You walk into the barbershop, sit down, and say “I want a mullet.” The barber stares back. You both know that tells them almost nothing. Modern mullets come in dozens of variations — skin fades, burst fades, curly, textured, subtle, dramatic — and one vague request leads to one disappointed client.
This guide fixes that. You’ll learn the exact words to use, the right questions to ask, what to expect in the chair, how much it costs, and how to walk out with a cut you’re actually proud of.
How to Ask for a Mullet: 4 Simple Steps
Getting the cut you want starts before you even sit in the chair. Follow these four steps every time.
Step 1: Know your style. Decide on your basic vision before you book. Do you want a subtle modern mullet or a bold, dramatic statement? Textured and choppy or smooth and sleek? Short back or flowing length? Browse Instagram, Pinterest, or TikTok with terms like “modern mullet fade” or “mullet haircut 2026” and screenshot anything you like.
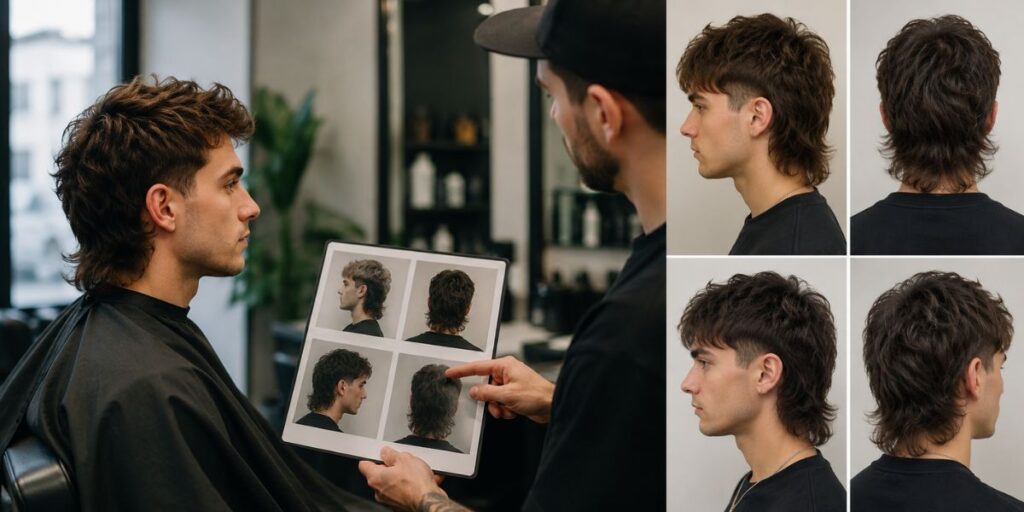
Step 2: Collect reference photos. Save 2–3 images that show the front, side, and back. This is the single most important thing you can do. Photos remove guesswork and give your barber a concrete target.
Step 3: Know your key details. Before the appointment, decide on: side guard number, back length in inches, fade or taper preference, and finish style (textured vs. smooth).
Step 4: Say it clearly in the chair. Example phrase to use:
“I want a modern mullet — mid fade on the sides starting around the temple, about 4–5 inches in the back, textured and choppy on top. Here are my reference photos.”
That one sentence gives your barber everything they need.
Finding the Best Mullet Barber in 2026
Not every barber can execute a sharp modern mullet. Here’s how to find one who can.
1. Search Instagram & TikTok First
Search “[your city] modern mullet barber” on Instagram. Look at tagged posts, not just the barber’s page. Real client results tell you more than studio shots. TikTok’s #mullethaircut and #modernmullet tags are packed with before-and-after content that helps you spot skilled hands fast.
2. Read Real Reviews (Not Just Stars)
Look for reviews that specifically mention mullets, fades, or textured cuts. A 5-star rating from someone who got a buzz cut means nothing for your request. Filter for specifics.
3. Visit the Shop Before Booking
If you’re investing in a quality cut, spend five minutes visiting the shop first. Watch how barbers communicate with clients, how clean the workspace is, and whether they ask questions or just start cutting.
4. Ask These Direct Questions
When you call or DM to book, ask:
- “Do you cut modern mullets regularly?”
- “Can I see recent mullet work?”
- “Are you comfortable with textured/disconnected styles?”
A confident barber will answer yes and send photos without hesitation.
What to Expect at Your Mullet Appointment
Knowing what happens in the chair makes the whole experience less stressful.
1. The Consultation Phase
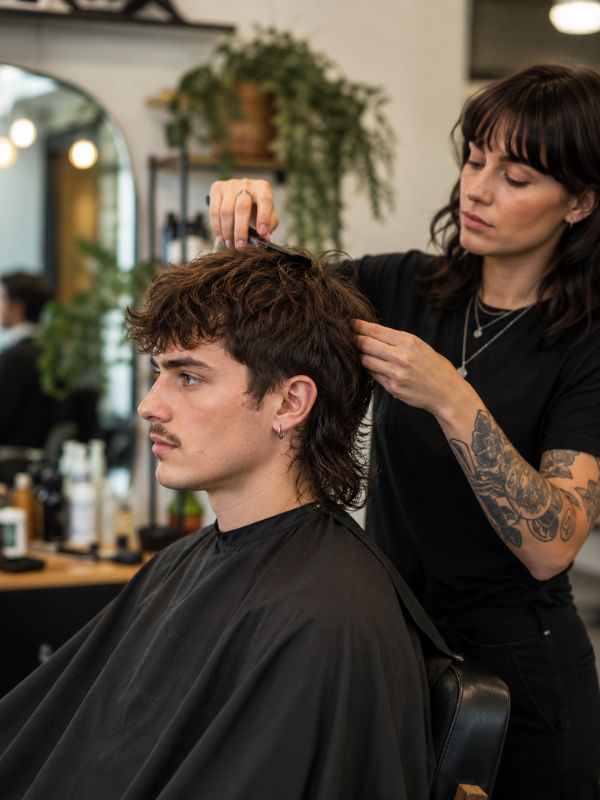
A professional barber will spend 2–5 minutes talking before touching your hair. They’ll ask about length, lifestyle, and styling habits. Show your reference photos here. This is also when you flag your hair type — curly, thick, fine, wavy — because it directly affects how they’ll execute the cut.
2. During the Cut, Expect Smart Suggestions
A skilled barber might say “your hair grows this direction so I’d adjust the neckline slightly” or “with your face shape, a mid fade would balance better than high.” Listen. They’re not changing your vision — they’re protecting it.
3. Keep Talking the Whole Time
Don’t go quiet and hope for the best. If something looks shorter than expected, say it. Ask “how’s the balance looking?” mid-cut. Barbers prefer real-time feedback over a disappointed silence at the end.
4. Quick Styling Lesson
Before you leave, ask your barber to show you how to style it. Ask which products they used and why. A good barber will walk you through a 60-second routine you can replicate at home.
Mullet Consultation Tips & Questions
Best Questions to Ask
| Question | Why It Helps |
| “What guard number for my sides?” | Controls exact length and contrast |
| “How many inches in the back?” | Locks in the mullet proportion |
| “Fade or taper — which suits my face?” | Gets expert input on balance |
| “Textured finish or smooth?” | Sets the overall look and feel |
| “How often will I need touch-ups?” | Helps you budget maintenance |
| “What products should I use?” | Makes at-home styling easy |
Why These Questions Matter
Guard numbers are not optional details. A No. 2 guard (¼ inch) looks dramatically different from a No. 4 (½ inch). That tiny difference defines whether your sides look tight and high-contrast or soft and blended. Ask specifically.
Ask for a Simple Step-by-Step Plan
Say: “Walk me through what you’re going to do.” Experienced barbers love this question. They’ll typically explain: set the back length → establish the fade → blend sides into top → add texture → clean edges. Knowing the plan helps you stay confident and catch anything that doesn’t match your vision.
Flag Your Hair’s Unique Stuff
Tell your barber if you have:
- Cowlicks or strong growth patterns
- Very thick or very fine hair
- Color-treated or chemically processed hair
- Previous cuts or shapes that affected length
This information changes how they section and cut, and skipping it causes problems.
How Much Does a Mullet Haircut Cost?
Global Pricing Breakdown
| Location | Basic Mullet | Full Mullet + Fade | Premium Barber/Salon |
| USA | $25–$40 | $45–$80 | $80–$150 |
| UK | £20–£35 | £40–£65 | £65–£120 |
| Australia | $30–$50 AUD | $55–$90 AUD | $90–$160 AUD |
| Pakistan/India | PKR 500–1500 | PKR 1500–3000 | PKR 3000–6000 |
| Europe | €20–€35 | €40–€70 | €70–€130 |
What Bumps the Price?
- High or skin fade (more technical work)
- Beard blending or additional edge work
- Premium product application
- Barbers with 10+ years of experience
- City-centre locations with higher rent
First Cut vs. Touch-Ups
Your first mullet often takes longer because the barber is establishing shape from scratch. Touch-ups every 3–4 weeks are shorter and usually cheaper. Ask about a loyalty price upfront.
Budget Hacks Worldwide
- Book with a senior apprentice at a reputable shop — same training, lower price
- Avoid peak Saturday slots; midweek appointments sometimes have lower rates
- Ask for a “shape-up only” if just maintaining the back and sides between full cuts
Professional Mullet Cutting Techniques
Understanding what your barber is doing helps you ask smarter questions.
1. Baseline Establishment
The barber sets the back length first, creating a reference point for everything else. This is why you must specify inches clearly — “I want about 5 inches in the back” is more useful than “longish.”
2. Graduation & Blending
The sides are faded or tapered from the bottom up, graduating through guard sizes (e.g., #1 → #2 → #3 → #4) to create a smooth transition rather than a hard line.
Key Techniques Real Barbers Use
- Point cutting — scissors angled into the ends to create soft, natural-looking texture instead of blunt lines
- Scissor-over-comb — blends the top into the back seamlessly, especially important for curly or thick hair
- Disconnection — deliberately separating the top from the sides for a bolder, modern contrast
3. Texturizing Magic
After the basic shape is set, barbers use a texturizing shear to remove weight and add movement. This is what separates a flat, heavy mullet from one that looks alive and effortless. Ask for “light texturizing through the top and back.”
4. Final Edge Work & Detailing
The trimmer comes out for the neckline, around the ears, and sideburns. This is where the cut goes from good to great. A clean, symmetrical edge makes the whole style look intentional.
Mullet Length Guide: Short, Medium, Long
Quick Length Chart
| Type | Back Length | Best For |
| Short Mullet | 2–3 inches | First-timers, professional settings |
| Medium Mullet | 4–6 inches | Most popular, versatile everyday look |
| Long Mullet | 7–10 inches | Bold statement, suits wavy/curly hair |
| Extreme Mullet | 10+ inches | Maximum impact, rock/alternative style |
Short Mullet (2–3 inches)
Clean, subtle, and office-friendly. The back just clears the collar. Best paired with a low or mid fade. This is the ideal starting point if you’re trying a mullet for the first time.
Medium Mullet (4–6 inches)
The sweet spot. Most people searching “modern mullet 2026” are after this length. It reads as intentional and stylish rather than experimental, works well with texture and fades, and suits most face shapes.
Long Mullet (7–10 inches)
Needs styling — a blow dryer, some curl cream, or a light wax. Looks best on wavy and curly hair where natural texture adds body. Requires more growth time if you’re starting from a shorter cut.
Extreme Mullet (10+ inches)
This is a commitment. Grows out over many months. Needs regular conditioning and shaping to avoid looking unkempt. Best with a skin fade or burst fade to maintain contrast.
Mullet Proportions & Neckline Styles
The Golden Ratio Pros Use
A well-balanced modern mullet keeps the top 1–2 inches shorter than the back. The sides should never be longer than the top, and the neckline should connect cleanly to the fade without a harsh line.
Balance Checklist
- Back length clearly longer than top
- Sides blend smoothly into the top
- Neckline clean and symmetrical
- No harsh lines between the fade and longer hair
Face Shape Quick Guide
| Face Shape | Best Mullet Approach |
| Oval | Works with all variations — you’re lucky |
| Round | High fade + pronounced layers to add vertical height |
| Square | Soft, textured sides to reduce jaw width |
| Heart | Choppy layers on top to reduce forehead focus |
| Oblong | Wider, fuller sides to add horizontal balance |
Neckline Options (Pick One!)
- Square neckline — bold, clean, defined. Best with skin fades.
- Rounded neckline — softer look, works well for medium and long mullets.
- Tapered neckline — gradual fade into the neck, the most natural finish, easy to maintain.
Best Fade Options for Mullet
Fade Cheat Sheet
| Fade Type | Where It Starts | Best For |
| Skin / High Fade | At or above temple | Maximum contrast, bold look |
| Mid Fade | At the temple | Goldilocks choice, suits most people |
| Low Fade | Just above the ear | Subtle, professional, easy to maintain |
| Taper | Just above ear/neck | Most natural, no skin showing |
| Burst Fade | Curves around the ear | Unique, works great with curly hair |
Quick Details
Skin fade looks sharp the day of the cut but grows out fast. Expect to be back in 2–3 weeks. Low fade grows out more gracefully. Good choice if you can’t visit the shop every 2 weeks. Burst fade adds a curved, semi-circular shape around the ear — highly popular for curly hair mullets.
Taper vs Fade
A taper gradually shortens the hair without ever exposing the skin. A fade goes down to the skin at some point. Tapers are more conservative and professional. Fades are more modern and high-contrast. If you’re unsure, ask for a “low fade” — it splits the difference perfectly.
Adding Layers, Texture & Edge Work
Why Layers Are Everything
Without layers, a mullet looks flat and heavy. Layers allow the hair to move, stack naturally, and look styled even on a no-effort morning. Ask for “face-framing layers through the top” and “light layers through the back.”
Texturizing Tricks Pros Use
- Point cutting through the ends for soft, airy movement
- Slide cutting through long sections to reduce bulk without losing length
- Razor texturizing for very fine or straight hair to add grip and separation
Edge Work = The Money Maker
Clean edges around the ears, neckline, and forehead make a mullet look intentional. Sloppy edges make any great cut look rushed. Always check your edges in a hand mirror before leaving the chair, front and back.
Can You Cut a Mullet at Home?
When It’s Kinda Okay to DIY
Maintenance only — trimming a straight back edge, cleaning up the neckline between appointments, or removing a little bulk from the back. If your mullet already has a good shape, minor upkeep at home is manageable with sharp scissors.
When to NEVER Touch the Scissors
- Setting the initial length or shape from scratch
- Cutting the fade or taper yourself
- Texturizing curly or thick hair
- Any detail work around the ears or neckline with clippers
These steps require professional skill. One wrong move on a DIY fade takes weeks to grow out.
Safe DIY Trim Steps (Only for Maintenance!)
- Work on dry hair so you see the true length
- Use sharp scissors only — dull scissors cause split ends
- Trim no more than ¼ inch at a time
- Cut straight across the back using a ruler or guide
- Stop when in doubt and book a professional touch-up
Mullet Before & After Results
1. The Office-Ready Glow-Up
Before: Standard short back-and-sides, zero personality. After: Short mullet with low fade, 2.5-inch back, light texture on top. Result: Still boardroom-safe, gets regular compliments, immediate confidence boost.
2. The First-Timer Win
Before: Long, unstyled hair, no shape. After: Medium mullet, mid fade, 4-inch back, choppy top. Strategy: Started at the shorter end of comfortable, planning to go longer next visit. No regrets.
3. The Curly Hair Comeback
Before: Curly hair fighting against itself, no defined shape. After: Curly mullet with burst fade, natural volume becomes the feature. Result: The curls became the star of the look instead of the problem.
What All Winners Have in Common
- Came in with reference photos
- Told their barber guard numbers and exact length
- Communicated during the cut, not after
- Trusted the barber’s technique while staying clear on vision
Conclusion
Asking for a mullet correctly is just communication. You don’t need technical jargon — you need clear details: back length in inches, side guard number, fade type, and a couple of reference photos. That’s it. The barber does the hard part.
Find someone who cuts mullets regularly, speak up in the chair, and your first modern mullet will be far better than you expect. Most people need 2–3 visits to dial in their perfect version. Start your journey, stay specific, and walk out with a cut that actually matches what you pictured.